Localhost SSL Certificate
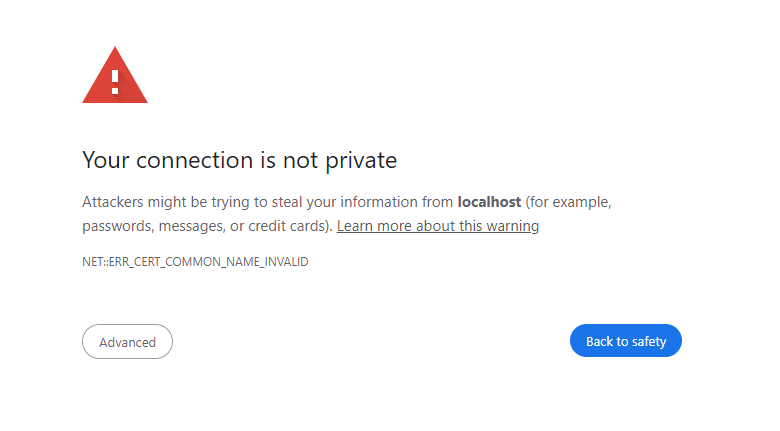
When developing locally, it's often useful to have a self-signed SSL certificate for localhost. This allows you to test your site with HTTPS without needing to purchase a certificate and avoid having to go through the invalid certificate screen.

This guide will show you how to create a self-signed SSL certificate for localhost using OpenSSL and add it to your trust store.
Components
We will need the following components to create a self-signed SSL certificate for localhost:
- OpenSSL
- A trust store (Builtin to Windows, Mac, Linux)
- A web server (Optional)
- A browser
Components we will make:
- A Certificate Authority (CA)
- A Certificate Signing Request (CSR)
- A Certificate
The Certificate Authority (CA) is a root certificate that will be used to sign the certificate for localhost.
The Certificate Signing Request (CSR) is a request for a certificate that will be signed by the CA.
The Certificate is the certificate that will be used by the web server.
The CA has a public and private key.
The public key is used to sign the CSR and is added to the trust store to verify certificates signed by the CA.
The private key is used to sign/create the new Certificate for the web server.
The ca.key and ca.crt files are the private and public keys for the CA. Treat the ca.key file as a secret and do not share it.
If a bad actor gets access to the ca.key file, they can create certificates that will be trusted by your trust store.
The CA is a private CA and by default is not trusted by browsers.
You will need to add the CA public key to your trust store to trust certificates signed by the CA.
Cert Management Setup
Lets create a folder in our home directory to house our certifactes we make and our scripts for generating them.
mkdir -p ~/certs
cd ~/certs
Create a Certificate Authority (CA)
Create the script for creating the CA key pair new_ca.sh
#!/usr/bin/env bash

show_help() {
    echo "Usage: $0 [options]"
    echo ""
    echo "Options:"
    echo "  -a, --ca-name <name>            Specify the CA name (default: 'spakl-ca')"
    echo "  -e, --encrypted '-aes256'       Specify the CA key to be encrypted with aes256"
    echo "  -p, --certs-proj-path <name>    Specify the path to the certs project (default: '\$HOME/certs')"
    echo "  -h, --help                      Display this help and exit"
}

# Default value for CA name
CA_PEM_NAME="ca" # Default CA name
CA_ENCRYPTED=""
CERTS_PROJ_PATH="$HOME/certs"
# Parse command-line options using getopt
TEMP=$(getopt -o 'a:e:p:h' --long 'ca-name:,certs-proj-path:,encrypt:,help' -- "$@")
if [ $? != 0 ]; then echo "Failed parsing options." >&2; exit 1; fi
eval set -- "$TEMP"

# Process each option
while true; do
    case "$1" in
        -h|--help)
            show_help
            exit 0
            ;;
        -p|--certs-proj-path)
            CERTS_PROJ_PATH="$2"
            shift 2
            ;;
        -a|--ca-name)
            CA_PEM_NAME="$2"
            shift 2
            ;;
    	-e|--encrypt)
            CA_ENCRYPTED="-aes256"
            shift 2
            ;;
    	--)
            shift
            break
            ;;
        *)
            echo "Ivalid Flag: $1"
            exit 3
            ;;
    esac
done

function gen_ca(){
    local ca_path="${CERTS_PROJ_PATH}/ca-certificates/${CA_PEM_NAME}"
    mkdir -p $ca_path
	openssl genrsa -out $ca_path/${CA_PEM_NAME}.key 4096
	openssl req -new -x509 -sha256 -days 3650 -key $ca_path/${CA_PEM_NAME}.key -out $ca_path/${CA_PEM_NAME}.pem
}

function gen_ca_encrypted(){
    local ca_path="${CERTS_PROJ_PATH}/ca-certificates/${CA_PEM_NAME}"
    mkdir -p $ca_path
	openssl genrsa -aes256 -out $ca_path/${CA_PEM_NAME}.key 4096
	openssl req -new -x509 -sha256 -days 3650 -key $ca_path/${CA_PEM_NAME}.key -out $ca_path/${CA_PEM_NAME}.pem
}

function show_ca(){
    local ca_path="${CERTS_PROJ_PATH}/ca-certificates/${CA_PEM_NAME}"
	# View Results
	openssl x509 -in $ca_path/${CA_PEM_NAME}.pem -text
}

case $CA_ENCRYPTED in
  -aes256)
    gen_ca_encrypted
    ;;
  *)
    gen_ca
    ;;
esac

show_ca
This script will create a new CA key pair and store it in the ~/certs/ca-certificates directory.
You can use flags to specify the CA name, encryption, and the path to the certs project.
-a, --ca-name <name>: Specify the CA name (default: 'spakl-ca')-e, --encrypted '-aes256': Specify the CA key to be encrypted with aes256-p, --certs-proj-path <name>: Specify the path to the certs project (default: '$HOME/certs')-h, --help: Display this help and exit
Run the script to create the CA key pair. you can name it your alias or project name.
./new_ca.sh -a vaaobr
This will prompt some questions for information on the certificate. You can leave them blank or fill them in as you see fit. After its complete it will output the certificate information.
You can check to make sure its stored in the correct location by running the following command:
#   ~/certs/ca-certificates/ca-name/ca-name.pem
cat ~/certs/ca-certificates/vaaobr/vaaobr.pem
-----BEGIN CERTIFICATE-----
MIIF+zCCA+OgAwIBAgIULi/ljuKizufcDgNwmKsrT6yJ3fUwDQYJKoZIhvcNAQEL
BQAwgYwxCzAJBgNVBAYTAnVzMQswCQYDVQQIDAJhejENMAsGA1UEBwwEbWVzYTEL
+Nlr84sKOVJMqfnaeK0fw0KwvqJxeUGB2QZ+UQcqE064lsiSkKTmGkmsj3vyAZce
W1rmKRK6xKpDA8Sgu5vJLo6LYJIj6m7KGxAlHNCe7XOJNUMnxhwMZJQqCpVdzQQ=
-----END CERTIFICATE-----
Create and Sign New Certificate
Create the script for creating the new certificate gen_cert.sh
#!/usr/bin/env sh
set -e

# Default values for options
CERTS_PROJ_PATH="$HOME/certs"
CA_PEM_NAME="" # Default CA name
CERT_PEM_NAME="localhost" # Default certificate name
DAYS_VALID=3650 # Default validity of the certificate
SUBJECT_CN="localhost" # Default Common Name for the certificate
SUBJECT_ALT_NAME="DNS:localhost,DNS:dev.localhost,DNS:*.dev.localhost,IP:127.0.0.1" # Default Subject Alternative Names
EXTENDED_KEY_USAGE="serverAuth" # Default Extended Key Usage
ENCRYPTED=""


show_help() {
    echo "Usage: $0 [options]"
    echo ""
    echo "Options:"
    echo "  -a, --ca-name <name>              Specify the CA name (default: 'spakl-ca')"
    echo "  -b, --cert-name <name>            Specify the certificate name (default: 'cert')"
    echo "  -c, --days-valid <days>           Specify the number of days the certificate is valid (default: 3650)"
    echo "  -d, --subject-cn <common name>    Specify the subject's common name (default: 'spakl.io')"
    echo "  -e, --subject-alt-name <SAN>      Specify the subject alternative names (default: 'DNS:*.null.spakl,IP:10.10.4.240')"
    echo "  -f, --encrypted <type, aes>       Encrypted CA key type (default: '')"
    echo "      --extended-key-usage <usage>  Specify the extended key usage (default: 'serverAuth')"
    echo "  -p, --certs-proj-path <name>      Specify the path to the certs project (default: '\$HOME/certs')"
    echo "  -h, --help                        Display this help and exit"
}
# Parse command-line options using getopt
TEMP=$(getopt -o 'a:b:c:d:e:f:p:h' --long 'ca-name:,cert-name:,days-valid:,subject-cn:,subject-alt-name:,extended-key-usage:,encrytped:,certs-proj-path:,help' -- "$@")
if [ $? != 0 ]; then echo "Failed parsing options." >&2; exit 1; fi
eval set -- "$TEMP"

# Process each option
while true; do
    case "$1" in
        -h|--help)
            show_help
            exit 0
            ;;
        -p|--certs-proj-path)
            CERTS_PROJ_PATH="$2"
            shift 2
            ;;
        -a|--ca-name)
            CA_PEM_NAME="$2"
            shift 2
            ;;
        -b|--cert-name)
            CERT_PEM_NAME="$2"
            shift 2
            ;;
        -c|--days-valid)
            DAYS_VALID="$2"
            shift 2
            ;;
        -d|--subject-cn)
            SUBJECT_CN="$2"
            shift 2
            ;;
        -e|--subject-alt-name)
            SUBJECT_ALT_NAME="$2"
            shift 2
            ;;
        -f|--encrypted)
            ENCRYPTED="$2"
            shift 2
            ;;
        --extended-key-usage)
            EXTENDED_KEY_USAGE="$2"
            shift 2
            ;;
        --)
            shift
            break
            ;;
        *)
            echo "Programming error"
            exit 3
            ;;
    esac
done

if [[ -z "$CA_PEM_NAME" ]]; then
	echo "CA_PEM_NAME is missing, use var or flag options: -a, --ca-name"
	show_help
	exit 0
fi

function gen_e_cert_key(){
    local ca_path="${CERTS_PROJ_PATH}/ca-certificates/${CA_PEM_NAME}"
    local cert_path="${CERTS_PROJ_PATH}/certificates/${CERT_PEM_NAME}"
    mkdir -p $cert_path
	echo "genertaing encrypted $CERT_PEM_NAME.key in $cert_path"

    # Generating the key and CSR
    openssl genrsa -out $cert_path/$CERT_PEM_NAME.key 4096

	echo "genertaing CSR $CERT_PEM_NAME.csr in $cert_path"
    openssl req -new -sha256 \
        -subj "//CN=${SUBJECT_CN}" \
        -key "$cert_path/${CERT_PEM_NAME}.key" \
        -out "$cert_path/${CERT_PEM_NAME}.csr"
}

function gen_cert_key(){
    local ca_path="${CERTS_PROJ_PATH}/ca-certificates/${CA_PEM_NAME}"
    local cert_path="${CERTS_PROJ_PATH}/certificates/${CERT_PEM_NAME}"
    local cn="//CN=${SUBJECT_CN}"
    mkdir -p $cert_path
	echo "genertaing $CERT_PEM_NAME.key in $cert_path"


    # Generating the key and CSR
    openssl genrsa -out $cert_path/$CERT_PEM_NAME.key 4096
	echo "genertaing CSR $CERT_PEM_NAME.csr in $cert_path"
    openssl req -new \
        -subj $cn \
        -key "$cert_path/${CERT_PEM_NAME}.key" \
        -out "$cert_path/${CERT_PEM_NAME}.csr"
}

function create_cert_ext(){
    local cert_path="${CERTS_PROJ_PATH}/certificates/${CERT_PEM_NAME}"
    mkdir -p $cert_path
    echo "creating extension file in $cert_path"
    # Create the extension file
    echo "subjectAltName=${SUBJECT_ALT_NAME}" > "$cert_path/${CERT_PEM_NAME}-extfile.cnf"
    echo "extendedKeyUsage = ${EXTENDED_KEY_USAGE}" >> "$cert_path/${CERT_PEM_NAME}-extfile.cnf"
}

function sign_e_csr(){
    local cert_path="${CERTS_PROJ_PATH}/certificates/${CERT_PEM_NAME}"
    local ca_path="${CERTS_PROJ_PATH}/ca-certificates/${CA_PEM_NAME}"

    echo "sign encrypted CSR"
    # Sign the certificate
    openssl x509 -req -sha256 -days "${DAYS_VALID}" \
        -in "$cert_path/${CERT_PEM_NAME}.csr" \
        -CA "$ca_path/${CA_PEM_NAME}.pem" \
        -CAkey "$ca_path/${CA_PEM_NAME}.key" \
        -CAcreateserial \
        -out "$cert_path/${CERT_PEM_NAME}.pem" \
        -extfile "$cert_path/${CERT_PEM_NAME}-extfile.cnf"

}

function sign_csr(){
    local cert_path="${CERTS_PROJ_PATH}/certificates/${CERT_PEM_NAME}"
    local ca_path="${CERTS_PROJ_PATH}/ca-certificates/${CA_PEM_NAME}"

    echo "sign CSR"
    # Sign the certificate
    openssl x509 -req -days "${DAYS_VALID}" \
        -in "$cert_path/${CERT_PEM_NAME}.csr" \
        -CA "$ca_path/${CA_PEM_NAME}.pem" \
        -CAkey "$ca_path/${CA_PEM_NAME}.key" \
        -CAcreateserial \
        -out "$cert_path/${CERT_PEM_NAME}.pem" \
        -extfile "$cert_path/${CERT_PEM_NAME}-extfile.cnf"
}

function cleanup(){
    local cert_path="${CERTS_PROJ_PATH}/certificates/${CERT_PEM_NAME}"
    echo "running cleanup"
    rm "$cert_path/${CERT_PEM_NAME}-extfile.cnf"
    rm "$cert_path/${CERT_PEM_NAME}.csr"
}

function verify_with_ca(){
    local cert_path="${CERTS_PROJ_PATH}/certificates/${CERT_PEM_NAME}"
    local ca_path="${CERTS_PROJ_PATH}/ca-certificates/${CA_PEM_NAME}"
    openssl verify -CAfile "$ca_path/${CA_PEM_NAME}.pem" -verbose "$cert_path/${CERT_PEM_NAME}.pem"
}

function fullchain(){
    local cert_path="${CERTS_PROJ_PATH}/certificates/${CERT_PEM_NAME}"
    local ca_path="${CERTS_PROJ_PATH}/ca-certificates/${CA_PEM_NAME}"

    cat "$cert_path/${CERT_PEM_NAME}.pem" > "$cert_path/${CERT_PEM_NAME}-fullchain.pem"
    cat "$ca_path/${CA_PEM_NAME}.pem" >> "$cert_path/${CERT_PEM_NAME}-fullchain.pem"
}


create_cert_ext

if [[ -z "$ENCRYPTED" ]]; then
    gen_cert_key
    sign_csr
else
    gen_e_cert_key
    sign_e_csr
fi

# Cleanup
cleanup

# Verify the certificate
verify_with_ca

# Create the fullchain PEM
fullchain
This script will create a new certificate and sign it with the CA key pair. The certificate will be stored in the ~/certs/certificates directory.
Create Localhost Cert
Now that the scripts are created and the ca is generated we can create a new certificate for localhost.
To use the script to create a new certificate, run the following command:
--ca-name: Specify the CA name, we made it with our aliasvaaobr--cert-name: Specify the certificate name, we will uselocalhost--subject-cn: Specify the subject's common name, we will uselocalhost--subject-alt-name: Specify the subject alternative names, we will useDNS:localhost,DNS:dev.localhost,DNS:*.dev.localhost,IP:127.0.0.1
./gen_cert.sh \
    --ca-name vaaobr \
    --cert-name localhost \
    --subject-cn "localhost" \
    --subject-alt-name "DNS:localhost,DNS:dev.localhost,DNS:*.dev.localhost,IP:127.0.0.1"
The --subject-alt-name is used to specify the alternative names for the certificate.
This is useful when you want to use the certificate for multiple domains or subdomains.
With the values we used we can use the certificate for localhost, dev.localhost, and *.dev.localhost.
You can check to make sure its stored in the correct location by running the following command:
#   ~/certs/certificates/name/name.pem
cat ~/certs/certificates/localhost/localhost.pem
-----BEGIN CERTIFICATE-----
MIIFqDCCA5CgAwIBAgIUZsi9y4mq2G9Of/pKfn8ScpaHtdMwDQYJKoZIhvcNAQEL
BQAwgYwxCzAJBgNVBAYTAnVzMQswCQYDVQQIDAJhejENMAsGA1UEBwwEbWVzYTEL
8xOOdxkQlvdg7QI78ommq+UB2sa828JX3x5L/GV+ABskIhR7Nls49UXZUHds2iXx
gqS046F6HGtVL+74
-----END CERTIFICATE-----
Add CA to Trust Store
To add the CA to the trust store, you will need to import the ca.pem file into your trust store.
Windows
To add the CA to the Windows trust store, follow these steps:
- Open the
ca.pemfile in a text editor. - Copy the contents of the file.
- Open the
Certificate Managerby pressingWin + Rand typingcertmgr.msc. - Navigate to
Trusted Root Certification Authorities>Certificates. - Right-click on the right pane and select
All Tasks>Import. - Follow the wizard to import the certificate.
Mac
To add the CA to the Mac trust store, follow these steps:
- Open the
ca.pemfile in a text editor. - Copy the contents of the file.
- Open the
Keychain Accessapp. - Drag the
ca.pemfile into theKeychain Accessapp. - Double-click on the certificate and change the trust settings to
Always Trust.
Linux
To add the CA to the Linux trust store, follow these steps:
- Run the following command to add the certificate to the trust store:
sudo cp name.pem /usr/local/share/ca-certificates/name.pem
sudo update-ca-certificates
Using the Certificate (Nginx Docker Demo)
You can now use the certificate with your web server. Here is an example of how to use the certificate with nginx:
user  nginx;
worker_processes  auto;
error_log  /var/log/nginx/error.log notice;
pid        /var/run/nginx.pid;
events {
    worker_connections  1024;
}
http {
    include       /etc/nginx/mime.types;
    default_type  application/octet-stream;

    log_format  main  '$remote_addr - $remote_user [$time_local] "$request" '
                      '$status $body_bytes_sent "$http_referer" '
                      '"$http_user_agent" "$http_x_forwarded_for"';

    access_log  /var/log/nginx/access.log  main;

    sendfile        on;
    keepalive_timeout  65;

    include /etc/nginx/conf.d/*.conf;
    ssl_session_cache   shared:SSL:10m;
    ssl_session_timeout 10m;
    server {
        listen 80;
        listen 443 ssl;
        server_name localhost;

        ssl_certificate /certs/localhost.pem;
        ssl_certificate_key /certs/localhost.key;

        location / {
            root /usr/share/nginx/html;
        }
    }
}
You can now access your site with HTTPS using the localhost domain.
services:
  web:
    image: nginx:alpine
    ports:
      - "80:80"
      - "443:443"
    volumes:
      - ./nginx.conf:/etc/nginx/nginx.conf
      - $HOME/certs/certificates/localhost:/certs
docker compose up
This will pull the nginx web server and start a basic web server with the localhost certificate.
You can now access your site with HTTPS using the localhost domain.
Go to https://localhost to see the site.

Also test the other domains you added to the certificate.
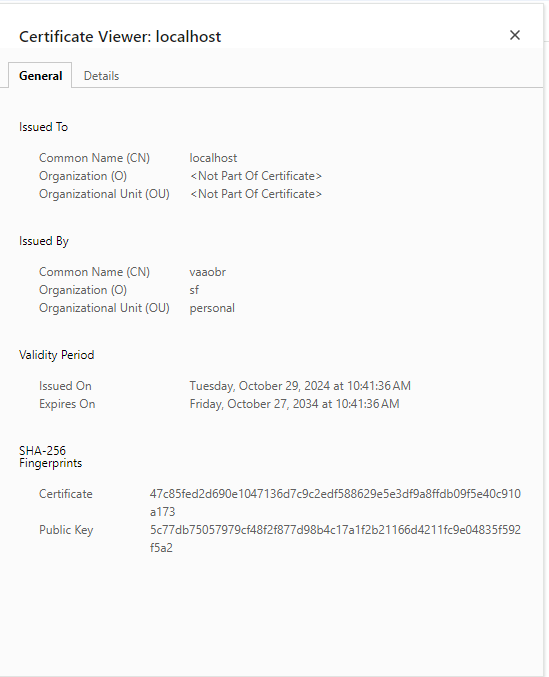
If you click on the cert in the browser you can see the info we used.
